Skip to ContentRC is a robotic mower
RC Series
The robot does not auto-depart from its base station.
Press any key on the robot’s panel. If the robot is not reacting to none of the buttons, and the System Switch is on, toggle the System Switch to Off-position and push the robot on the Base station in order to try refreshing the battey. When the robot starts recurrent resets, change the System Swtich to on and let the robot be charged to full, at least 24 hours. Wait to see if the robot auto depart to mow as expected. If it won’t, proceed with the diagonisis below.
Q1 -Press the OK-button and observe if there is an error displayed on the robot.
Did you have an error message on the robot’s display?
If Yes – Follow the error message list which exists in article Error Message Table
If No (the robot doesn't show any error) – click 'HOME' button and observe the No Depart Reason from the list below:
Description of No-Depart Codes
| Code | Description | Corrective Action |
| 0 | None. Automatic departure is working properly. | None. Wait for the end of current charging cycle. |
| 1 | Mower’s battery is not yet in the required state for automatic departure. | None. Wait for the end of current charging cycle. May take longer than usual. |
| 2 | Inactive Time is activated. No automatic departure during the Inactive Time. | None. Validate Inactive Time settings (see Section 6.4.1). |
| 3 | Mowing cycle is completed. Waiting for the next scheduled operation. | None |
| 4 | Humid conditions or rain were detected during the last 30 minutes. | None. If the rain has stopped, wait for at least another 30 minutes. |
| If there was no any rain at all, adjusting the rain sensor’s sensitivity by pressing the settings button for 4 seconds (Menu P008). (27) - High sensitivity (detects rain fast) (25) - Med sensitivity (20) - Low sensitivity (detects rain slowly) It is recommended to avoid setting value higher than 27. | ||
| 5 | The mower is switched off. | Switch on the Safety Switch. |
| 6 | Demo mode is enabled | Disabled Demo mode by going to Service --> Menu P236. |
| 7 | User response (interaction) is required in order to continue the current operation. | Acknowledge the error message. |
| 8 | Multiple consecutive mowing operations were shorter than expected. Usually accompanied by U018 (“Operation time is shorter than expected”). | Inspect the mower’s blade and drive wheels. |
| Battery run-time may be too short. | ||
| 9 | One-Time setup is running. | One-Time setup should be completed before the automatic operation can start. |
| 10 | Automatic operation is disabled by menu P021. | Enable automatic operation through menu p021. |
| 11 | Program on/off flag in the EEPROM is disabled. | Enable automatic operation through menu P021 or through the APP or through the Power Box. |
| 12 | Automatic operation is put on pause by the Power Box. | Un-pause automatic operation on the Power Box or through menu P021. |
| 13 | All weekdays are set as inactive days. | Validate Inactive Time settings (see Section 6.4.1). |
| 14 | The mower is being charged directly by the Power Box (via the DC connector). | Disconnect the DC cable from the mower. Put the mower in the Base Station. |
| 15 | Battery cells are being balanced in special charging mode. | None. Wait for the end of the current charging cycle. May take longer than usual. |
| 16 | The mower is in the Base Station, but there is no charging voltage supply. | Inspect the Power Box’s connection to the Base Station. |
| Confirm that nothing is blocking the charging pins. | ||
| 17 | Low ambience temperature | None. The mower will automatically depart when it gets warmer. |
| 18 | Sub-Zone entry problem. The mower was unable to enter one of the Sub-Zones. | Refer to U090-U093 in Section 9.3. |
If until now nothing valid was found, proceed to Q2.
Q2 -Make sure the Power Box is connected to the main power socket. Check that Power Box display indicators #1 and #3 are functioning well. Check that indicator #2 is not switched to ON = robot in Pause (a red light will be displayed). See the explanation in the table below for each number.
1. Docking Indicator - Mower is in it's base station
2. Automatic Indicator - Mowing schedule is in pause mode
3. Operating Indicator - Mower is not in the base station
4. Wire Indicator - The perimeter wire is cut, disconnected or too long
5. All indicator flahs - Mower didn't return to the base station after 4 hours of departure.
6. All indicator flahs and beeps - Theft detection
Is indicator #2 ON (a red light is displayed)?
If Yes - proceed to Q3.
If No- proceed to Q4.
Q3 -Press for two seconds on the Pause button to release the halt (the red light will disappear). Wait until the robot departs automatically out of the Base Station to mow.
Does the robot depart from the Base Station Automatically?
If Yes – Let the robot run a few days and observe a clean cut lawn.
If No – Proceed to Q4.
Q4 -Check that the Inactive time on the robot was set correctly. Is it configured correctly?
If Yes - Proceed to Q5.
If No - Correct the Inactive time accordingly and wait until the robot departs automatically out of the Base Station to mow.
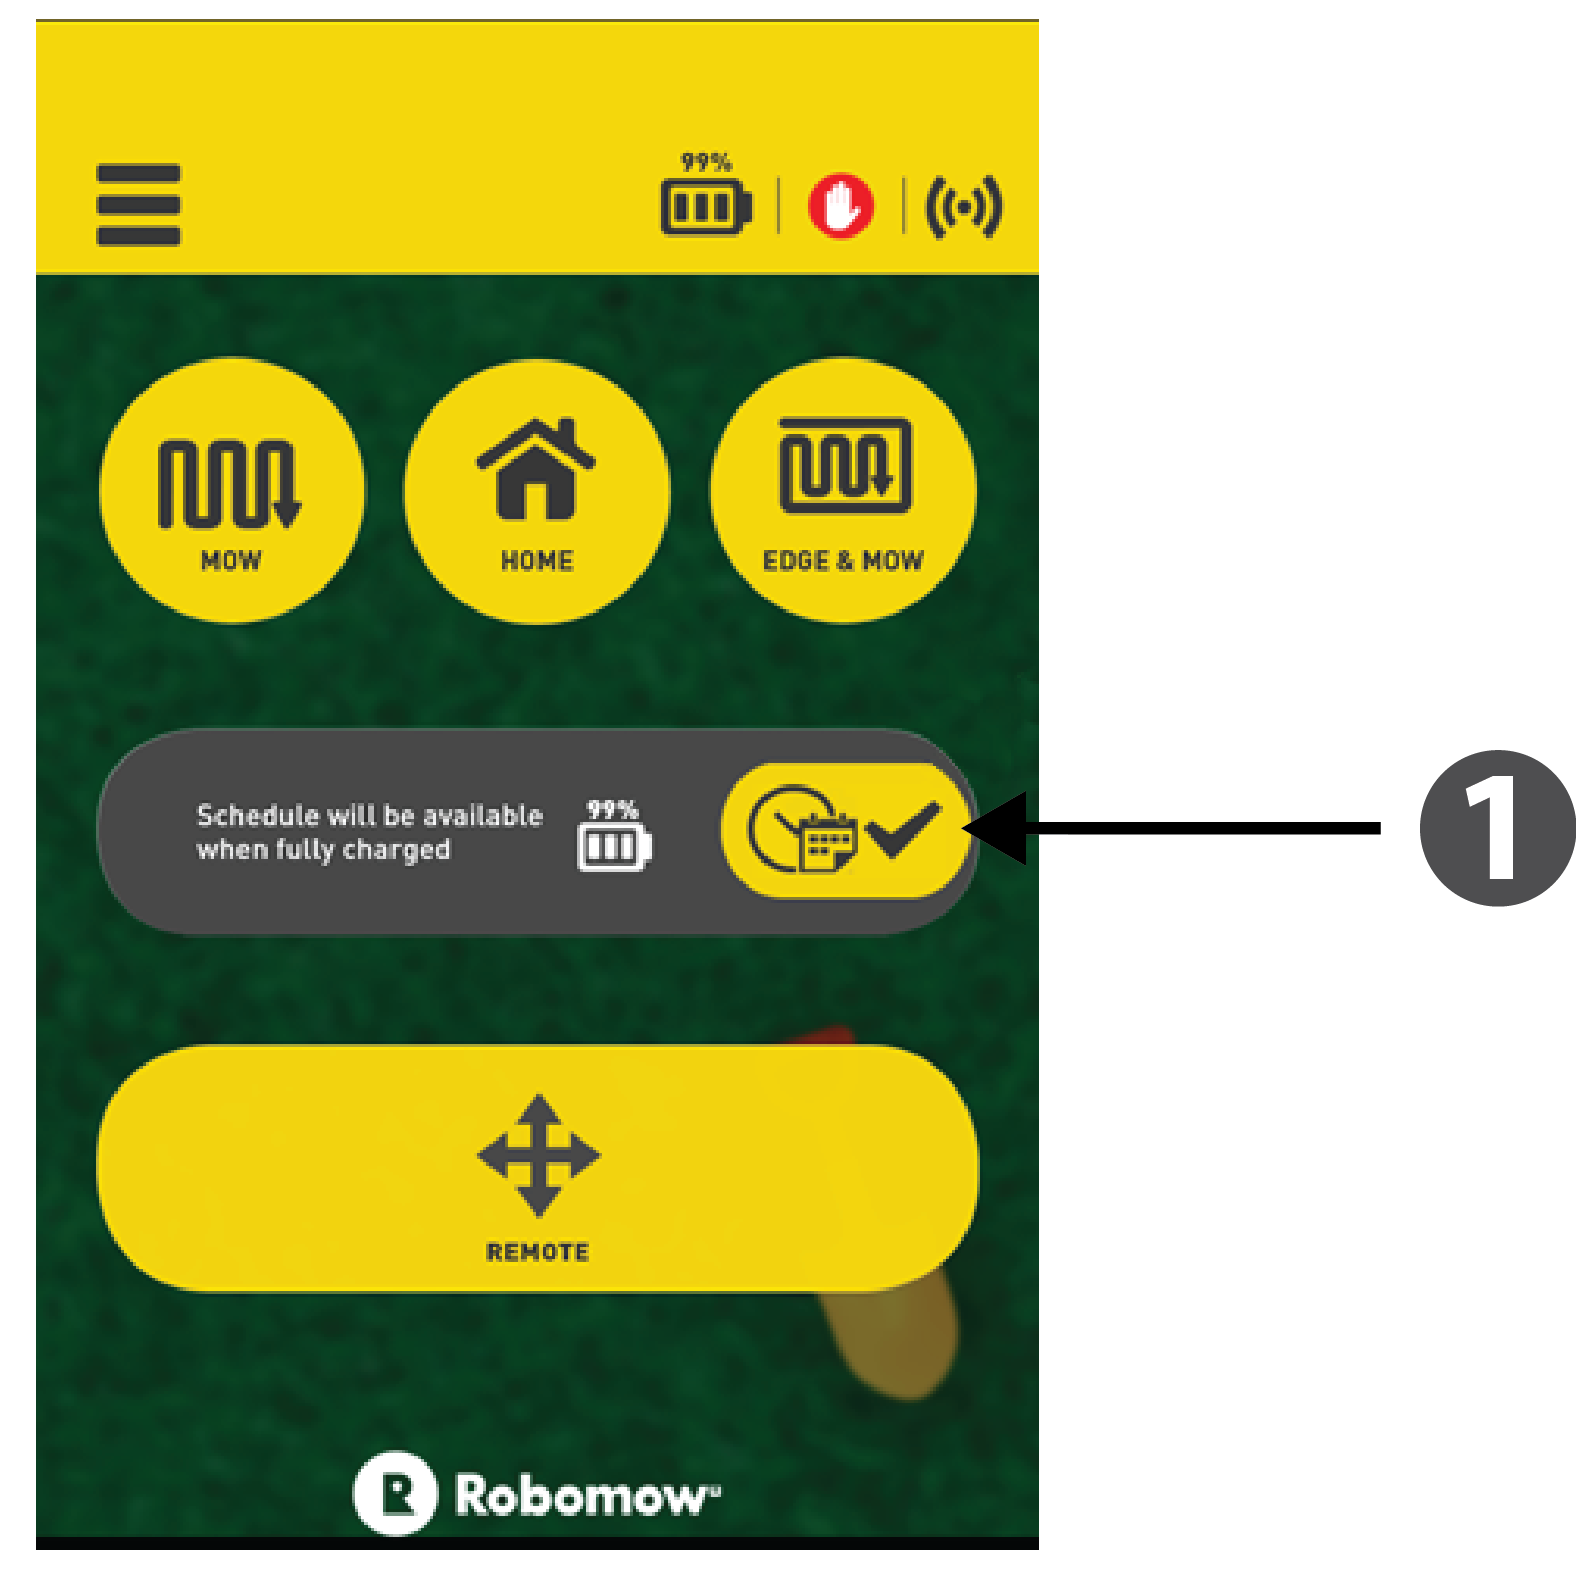
Q5 - Do you use a Robomow App on your smart device?
1. This button enables/disables automatic operation.
If Yes - Make sure the Automatic depart was not
deactivated. Gray means that the automatic depart
is set to "off". If the auto departs button is active
(yellow), proceed to Q6.
If No - Proceed to Q6.
Q6 - Push the robot onto the Base Station and wait a few
minutes. Is the House icon seen on the left
screen side of the display?
If Yes - It means the robot detects that it is at the Base Station (which is correct). Contact Robomow hotline for further investigation.
If No - It means the robot detects it is in Winter Charging mode (which is not the case). Proceed to Q7.
Q7 -Remove the robot from the Base Station, open the Base Station cover and disconnect the BLE board from the Base Station board. Click here for watching the video how to replace BLE board.
Push the robot back onto the Base Station. Wait a few moments, and check if the display is showing the Home icon on the left screen side of the display.
If Yes – Need to replace the BLE board.
If No – Need to replace the Base Station Board.
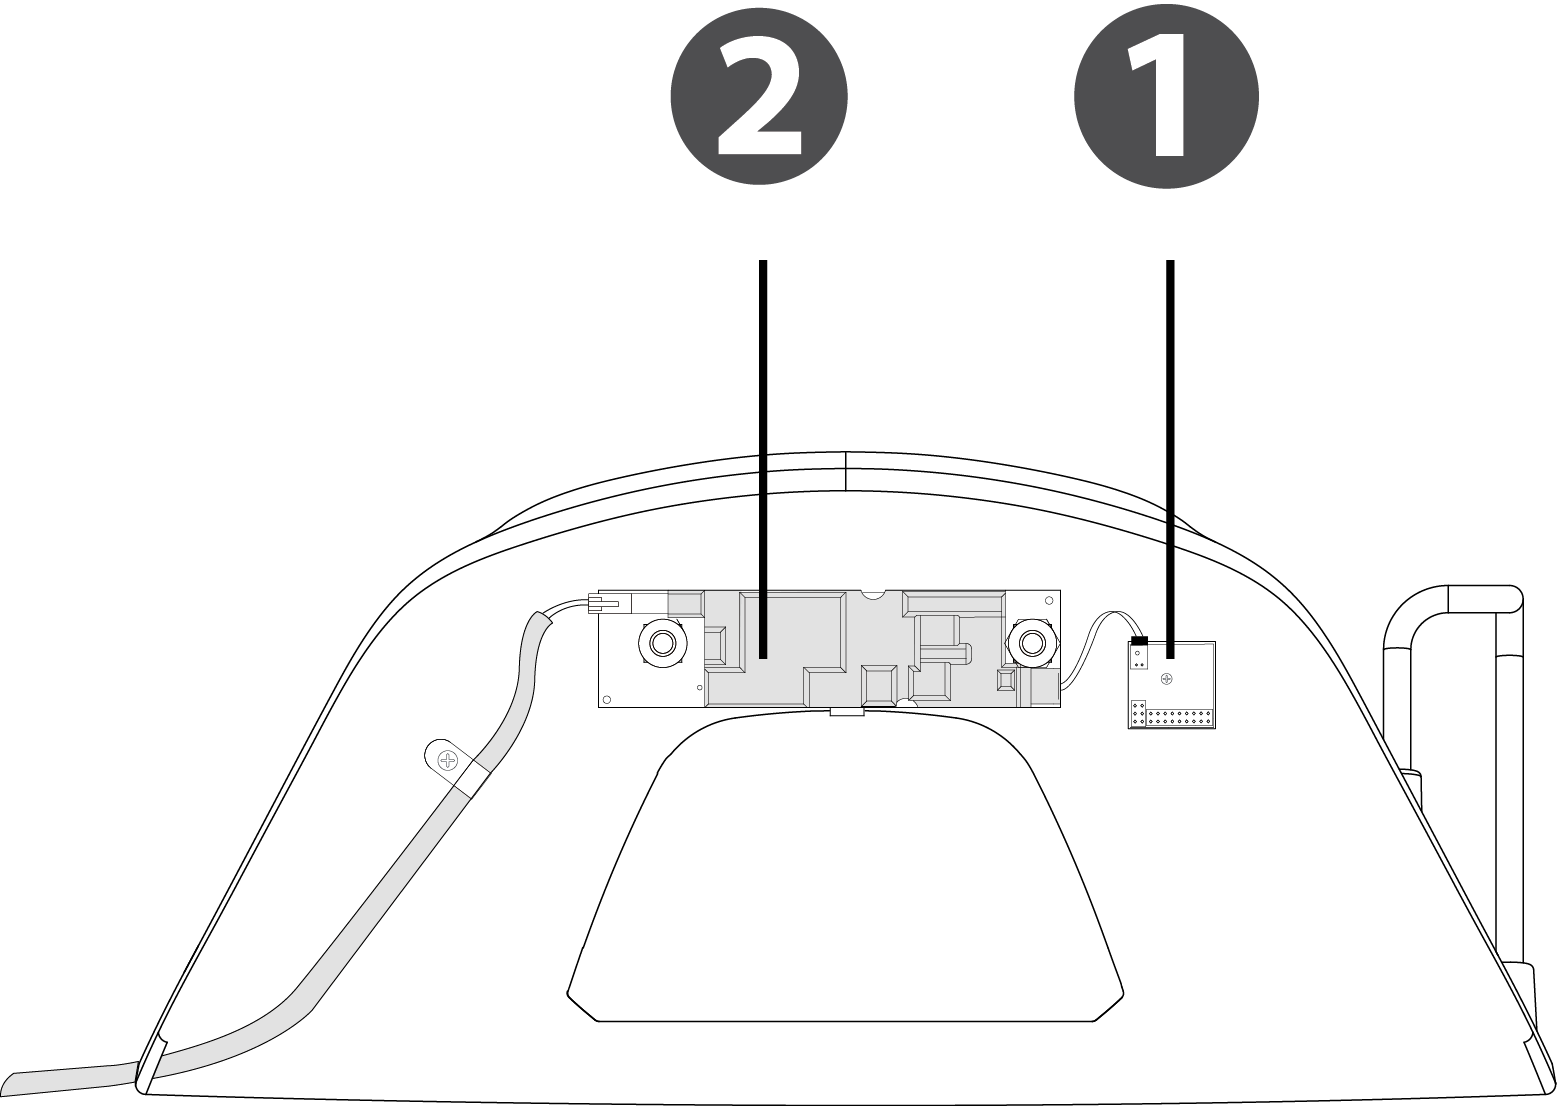
1. BLE board
2. Base Station board